
Have you ever looked through a seed catalog and been tempted by the beautiful photos of flowers and veggies, or walked past the seed packet display at the hardware store and wondered about all the amazing seeds that are available? Did you talk yourself out of purchasing because growing plants from seeds is just too hard? Well, I believe you can and should try growing plants from seeds and I know there is an excellent chance that this process can be enjoyable for you as well as a very rewarding gardening experience. In this blog I will share the steps I follow each spring when I start my garden from seed. Join me as I take you through the process step by step.
Step 1. Let’s start with the soil. When starting your seeds, consider using a seed starting mix, also known as sterile seed mix. My reason for recommending seed starting mix instead of using regular potting mix is that regular potting soil can often contain soil gnats which can feast on your seeds. Soil gnats look like tiny black flies on or flying around your plant. When those nasty little gnats go after your seeds and seedlings, the damage can go unnoticed until it is too late. Soil gnat damage will show as wilting, yellowing leaves, poor growth, and failure of the seedling to thrive. Using a mix designed especially for seed starting will greatly lessen the chance of soil gnats invading your seed starting area. I use Miracle Grow Seed Starting Potting Mix, but there are many seed starting mixes on the market that would work well. There are also sterile seed starting mix recipes on the internet if you would prefer to mix your own. A basic, sterile seed starting mix recipe should consist of peat moss (or coco coir), vermiculite, and perlite in equal parts. Do an internet search to find the recipe that works best for you.
Step 2. To get the soil to the best moisture level for your seedlings, you should add water to the soil before planting the seeds. Put the soil into a waterproof container such as a bucket or plastic storage box. Add small amounts of water to the seed starting mix in the container until you can squeeze some of the mix in your hand and it holds together without dripping water. If it easily crumbles or falls apart in your hand, then it is too dry. You want the soil to hold together when squeezed gently in your hand but not drip water. This is the right moisture level for giving your seeds their best start.
Step 3. I find it most helpful to thoroughly read the back of the seed packet completely before planting my seeds. You will find very helpful information on the back of the packet such as seed planting depth, the number of days from planting the seed until germination, seed spacing and when to start your seeds. Also found on the seed packet will be helpful tips for transplanting seedlings like spacing of plants, days till harvest, height of mature plant and whether the plant is frost hardy. Remember, days till harvest or maturity begin when the plant is transplanted into the ground outside, not when you plant the seed.
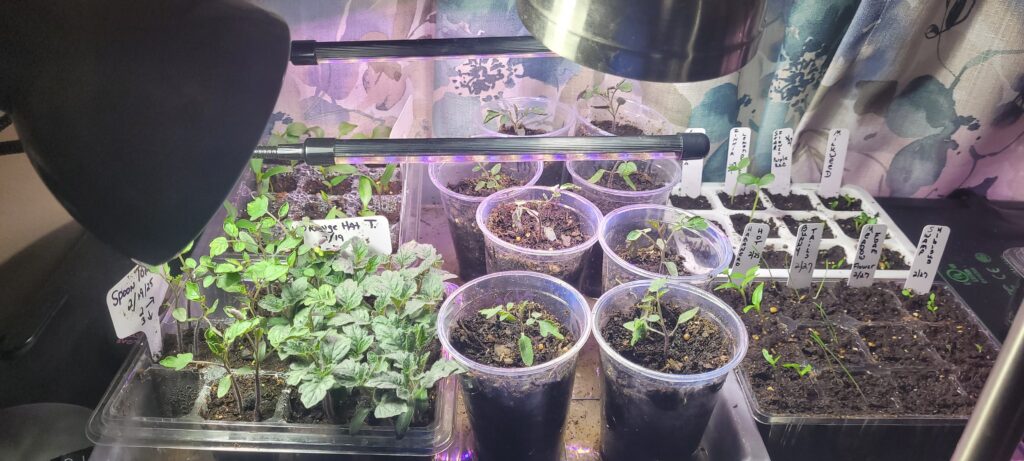
Step 4. Wondering what to use to plant your seeds in? When it comes to seed starting containers you have choices. You can purchase seed starting cell packs with bottom watering trays and humidity covers. These are great and I have several that I use regularly, but these are not absolutely necessary. Seeds can also be started in two plastic drinking cups like Solo brand cups. Make sure you are using a food safe plastic cup. A plastic milk jug is another possible seed starting container.
Now let’s talk about what to do once you have your container. If using a cell pack, fill each cell with seed starting mix and gently tap the cell pack to settle the soil. Fill the cell to the top. Make a small indention in which to place the seed. Fill the bottom watering tray to it’s fill line. Place the cell pack into the watering tray. Plant your seed according to the depth specified on the seed packet. Place the humidity cover on the cell pack. If you are using plastic drinking cups, punch a hole or two in the bottom of one of the cups. Use the other plastic cup (without a hole in the bottom) as a watering tray by filling the cup about 1/3 full of water. Then place the cup with the hole in the bottom, which you have filled with seed starting mix, into the cup with the water. This allows your seedling to draw up water as needed just like the cell packs draw water up from the watering tray. You can use plastic wrap (like Saran Wrap) secured with a rubber band over the top of your seedling cup for a humidity cover. I have used this plastic cup method to start seeds many times and have had very good success. This is a good method to use if you plan on sharing seedlings with friends or family. You can give them the seedling in its double cup without disturbing the seedling. Another method is to use a plastic 1 gallon milk jug. Simply cut almost all the way around the jug about 3 inches up from the bottom of the jug. You want to be able to open the jug like a flap. Put seed starting mix into the jug almost all the way up to the cut opening. Plant your seeds and close the jug. Secure the outside of the jug with tape to keep it closed Painter’s taper works well. Place outside in a sunny area. Do not put the cap on the jug. You want there to be an opening for air flow and to be able to see into the jug to check on your seeds. One your seedlings have grown enough to be transplanted, remove the tape and open the jug. Carefully remove the seedling and transplant. I used this method recently to start some sweet peas and it worked very well.
-Gram